
Here you’ll find an easy step-by-step tutorial for Fruit and Vegetables Drawing.
Perfect for kids, beginners, parents, and teachers!
Drawing fruits and vegetables is a fun way for kids to explore shapes, colors, and simple art skills.
This tutorial is great for young artists because each item is easy to draw with clear, simple steps.
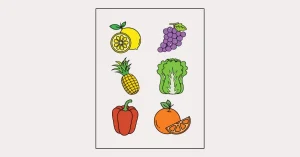
By the end, kids will learn how to draw lemons, grapes, pineapples, lettuce, bell peppers, apples, and orange slices—all in one page!
Let’s get started and have some creative fun.
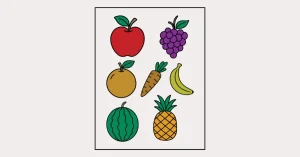
Preview of the Step-by-Step Fruit and Vegetables Drawing Tutorial

Drawing Materials
Kids only need a few items:
- Pencil
- Eraser
- Coloring pencils or crayons
- Black marker (optional for outlining)
Coloring Options
You can use crayons, markers, or color pencils.
Try bright colors like yellow for lemons, purple for grapes, red or green for apples, and orange for slices.
Kids can also mix colors or add shading to make each fruit or veggie look fun and lively.
Paper
Use a sketchbook sheet or A4 drawing paper.
This size is easy for kids and gives enough space for all drawings.
Step-by-Step Fruit and Vegetables Drawing Guide
Below are clear steps based on the uploaded image.
Each step adds one new fruit or vegetable until the whole page is complete.
Step 1: Draw a Lemon
Start by drawing a circle with a small leaf on top.
Add a slice shape beside it to show the inside of the lemon.

Step 2: Draw a Grapes Next to the Lemon
Add a bunch of small round circles grouped together.
Draw a tiny leaf on top to complete the grape shape.

Step 3: Add a Pineapple Under the Lemon
Draw a long oval for the pineapple.
Add crisscross lines and a leafy crown on top.

Step 4: Draw a Lettuce Next to the Pineapple
Add a wavy shape with leafy lines inside.
Keep the edges soft and curly to look like fresh lettuce.

Step 5: Add a Bell Pepper Under the Pineapple
Draw a rounded bell shape with three bumps at the bottom.
Add the stem on top.

Step 6: Draw an Orange Beside the Bell Pepper
Make a simple round shape with two bumps on top.
Add a leaf and a short stem.

Step 7: Color the Lemon
Color the lemon bright yellow. Add green to the leaves.

Step 8: Color the Grapes
Color the grapes purple. Add green to the leaves.

Step 9: Color the Pineapple
Use yellow and brown for the pineapple body.

Step 10: Color the Lettuce
Color the crown and lettuce green.

Step 11: Color the Bell Pepper
Make the bell pepper red or green.

Step 12: Color the Orange Slice
Use a rich orange shade for the slice. Add darker lines for detail.

Final Touch
That’s it! You have learned how to create a full Fruit and Vegetables Drawing page.
Now color the drawings in your favorite shades and show your artwork to family and friends.
Keep practicing, and soon you’ll draw even more foods with ease!
FAQs about Fruit and Vegetables Drawing
Q1: How can kids draw fruits and vegetables easily?
Kids can start with simple shapes like circles and ovals.
Then they follow each step in this guide to add small details.
Q2: What colors should kids use for fruit and vegetable drawings?
Kids can use bright colors like yellow, red, green, and purple.
They can also mix colors to make their drawings fun.
Q3: Is this drawing tutorial good for beginners?
Yes! The steps are simple and short.
Kids and beginners can follow them with ease.
Q4: What age group is this tutorial for?
This guide is great for ages 4 and up.
Younger kids may need a little help from an adult.
Q5: Can kids use markers instead of crayons?
Yes, they can use markers, crayons, or color pencils.
Any tool is fine as long as they enjoy the process.