Here you’ll find an easy step-by-step tutorial for a mushroom drawing.
It is perfect for kids, beginners, and anyone who loves to draw cute things.
Today we will learn how to draw a bright and fun mushroom.
Kids love mushroom drawings because they are round, colorful, and full of simple shapes.
This lesson helps young artists learn curves, circles, and smooth lines.
A mushroom drawing is also great for building hand control.
Kids can enjoy shapes like domes, dots, leaves, and stems.
Let’s draw together and have fun!
Preview of the Step-by-Step Mushroom Drawing Tutorial

Drawing Materials
• Pencil
• Eraser
• Black marker (optional)
• Coloring pencils or crayons
• A simple table and good light
Coloring Options
Kids can pick any fun colors they like.
Bright pink, blue, green, yellow, and red look great on mushrooms.
Crayons give soft color, and markers give bold color.
Mix colors to make the mushrooms look magical.
Paper
Use A4 paper or sketchbook paper.
Both work well for drawing and coloring.
Step-by-Step Drawing Guide
The steps below match the drawing sequence shown in the image you uploaded.
Each step is simple and clear so kids can follow with ease.
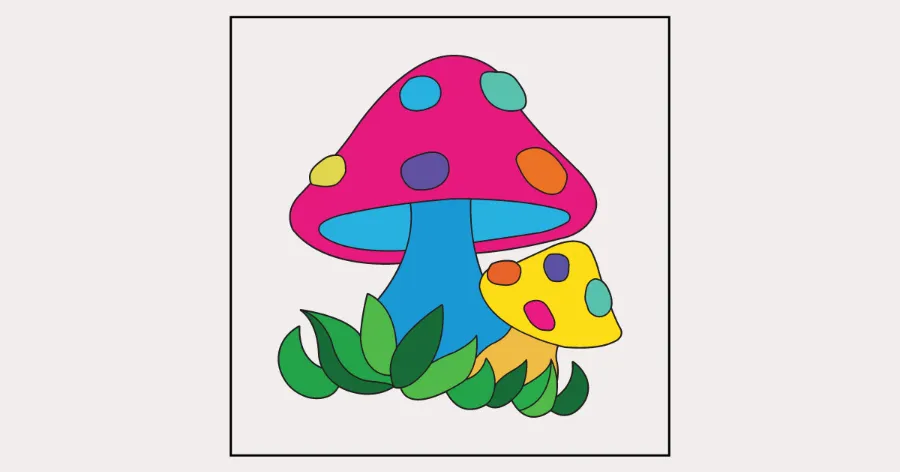
Step 1: Draw the top of the mushroom.
Start with a large dome shape.
Add a curved line inside the dome to show the underside of the cap.

Step 2: Add the stem.
Draw a long and soft shape under the cap.
Make the stem a little wider at the bottom.

Step 3: Add a small mushroom.
Draw a smaller dome shape on the right side.
Add a short stem under it.

Step 4: Draw the grass.
Draw simple leaf shapes under both mushrooms.
Make the leaves round and soft.

Step 5: Add spots on the mushroom caps.
Draw circles on the big cap.
Add more circles on the small cap.

Step 6: Start coloring the big mushroom cap.
Color the large cap bright pink or red.
Leave the spots white.

Step 7: Color the stem blue.
Add rich blue color under the big mushroom cap.
Color the small mushroom stem the same way.

Step 8: Add color to the small mushroom cap.
Color the small cap yellow.
Leave the dots white.

Step 9: Add more color to the spots.
Use bright colors like green, blue, red, and purple.
Color each dot a different shade.

Step 10: Color the grass.
Use green for the leaves.
Use dark green and light green for more fun.

Final Touch / Conclusion
That’s it!
You have learned how to make a bright and fun mushroom drawing step by step.
Now you can add more plants, bugs, or even a forest background.
Use your best colors and show your art with pride.
Great work!
FAQs
Q1: How can kids draw a mushroom easily?
Kids can start with a dome shape and a small stem.
Then they follow each simple step in this guide.
Q2: What colors look best on a mushroom drawing?
Bright colors like pink, yellow, blue, and green look great.
Kids can use any colors they enjoy.
Q3: Do beginners need special tools to draw a mushroom?
No. A pencil, paper, and crayons are enough.
Kids can add a marker for bold outlines.
Q4: Is this mushroom drawing good for young kids?
Yes. The shapes are simple and clear.
Kids of all ages can enjoy it.
Q5: How long does it take to draw a mushroom?
Most kids finish the drawing in 10 to 15 minutes.
Coloring may take longer, depending on the details.